Tag: Network Security Page 1 of 3

AI-Driven DPI in Cybersecurity Threat Detection

Unlocking Suricata’s Full Potential: AI-Driven DPI Tactics for 2025 🌐

🌿 Why AI-Driven DPI Matters for Suricata in 2025

Let me start with a story. Last year, a client’s network was flooded with false positives from their Suricata setup. They were drowning in alerts, missing real threats. Sound familiar? That’s where AI-driven DPI steps in.

In 2025, cyberattacks are smarter—think encrypted C2 channels and domain fronting. Traditional DPI struggles with these stealthy tactics, but AI-enhanced Suricata uses machine learning to decode encrypted traffic and spot anomalies like non-standard protocol usage.

Here’s the thing: AI doesn’t just reduce false positives by 40%; it turns Suricata into a predictive shield. By analyzing metadata patterns, AI anticipates threats before they strike.


🔍 How AI Enhances Suricata’s Deep Packet Inspection

Suricata’s core strength lies in its rulesets, but AI supercharges them. Let’s break it down:

  1. Contextual Metadata Enrichment
    AI tools like ChatGPT analyze Suricata’s alert payloads, adding context to threats (e.g., linking C2 traffic to MITRE ATT&CK techniques like T1071).
  2. Protocol Agnosticism
    Next-gen DPI identifies any protocol—legacy, IoT, or custom—making Suricata adaptable to hybrid networks.
  3. Real-Time Adaptation
    Machine learning models update rules dynamically. For example, if Suricata detects a new ransomware variant, AI tweaks detection parameters in seconds.

🛠️ 3 Tactics to Implement AI-Driven DPI Today

Tactic 1: Integrate Suricata with MITRE ATT&CK Mapping
Use automated tools to map Suricata rules to MITRE techniques. Tools like Automated Suricata-to-ATT&CK Mapper leverage NLP to classify threats accurately, even with limited labeled data.

Tactic 2: Deploy AI-Powered Traffic Analysis
Pair Suricata with AI platforms like Stamus Networks. Their webinar (watch here) shows how AI identifies malware like Xloader by correlating flow data and payloads.

Tactic 3: Optimize Rules with Predictive Analytics
Train models on historical Suricata logs to predict emerging threats. For example, AI flagged a spike in DNS tunneling months before it became widespread in 2024.


🚧 Overcoming Challenges: Ethics, Data, and Skill Gaps

Challenge 1: Data Quality
AI thrives on clean data, but Suricata’s logs can be noisy. Fix this by preprocessing data—remove duplicates, standardize tags, and use TF-IDF vectorization for “msg” fields.

Challenge 2: Ethical AI Use
Avoid bias by auditing AI outputs. For instance, ensure models don’t disproportionately flag traffic from specific regions.

Challenge 3: Reskilling Teams
72% of companies now train staff in AI tools (McKinsey). Start with free courses on Suricata’s official documentation and MITRE’s ATT&CK framework.


🔮 The Future of AI and Suricata: What’s Next?

Imagine Suricata 2026: self-healing rules, zero-day prediction, and seamless XDR integration. But today, focus on hybrid human-AI workflows. Let AI handle packet inspection while your team strategizes responses.

As Peter Manev from Stamus Networks says, “AI isn’t replacing analysts—it’s making them superheroes.” 🦸


📌 Final Thoughts

Unlocking Suricata’s potential isn’t about chasing shiny tools. It’s about blending AI’s speed with human intuition. Start small: map one ruleset to ATT&CK, attend a webinar, or trial an AI analyzer.

Ready to transform your network security? The future’s here—and it’s powered by AI-driven DPI.

2025 WiFi hacking tools on a hacker’s desk with code overlay

2025 WiFi Hacking Tools: 14 Must-Have Tools for PenTesters 🚀

Ever stared at a WiFi network and thought, “I could crack that”? Let’s talk about the tools that’ll make it possible—ethically, of course.

Last summer, I was auditing a client’s “ultra-secure” office network. Their IT team swore it was impenetrable. Two hours later, Aircrack-ng and Fluxion proved them wrong. Tools evolve rapidly, and 2025’s lineup is a hacker’s dream. Whether you’re a seasoned pro or a curious newbie, here’s your arsenal.

1. Aircrack-ng Suite

The granddaddy of WiFi hacking just got smarter. The 2025 update introduces AI-powered WPA3-PSK cracking, slashing attack times by 40%. I once cracked a weak handshake in 8 minutes during a café audit—coffee was still warm!


2. Wifite 3.0

Automate or die trying. Wifite 3.0’s Stealth Mode disguises attacks as Netflix traffic. Perfect for bypassing enterprise detection systems. Last month, I tested it on a bank’s guest network—zero alerts triggered.


3. Kismet 2025

Kismet now maps 5G/6G networks and IoT devices in real time. During a hotel pentest, it spotted a hidden IoT thermostat leaking data. Creepy? Yes. Effective? Absolutely.


4. Fern WiFi Cracker Pro

Fern’s GUI is so intuitive, even your grandma could crack WPA2. The 2025 Pro version auto-generates audit reports—saved me 6 hours on a client deliverable last week.


5. Hak5 WiFi Pineapple Mk8

This pocket-sized monster now runs AI-driven phishing campaigns. Set it in a park, and it’ll craft convincing Starbucks login pages. Scary fun.

  • OS: Custom Linux-based firmware
  • DownloadHak5 Store

6. Bettercap 3.0

Bettercap’s MITM attacks now inject malware into HTTPS traffic. I demonstrated this on a smart fridge—yes, a fridge—to prove IoT vulnerabilities. Client upgraded their network overnight.


7. PacketSafari

Cloud-based packet analysis that lets teams collaborate globally. Used it during a transatlantic pentest—real-time insights cut our project time by half.


8. OWASP ZAP 2025

ZAP’s new WiFi plugin scans for default router passwords and outdated firmware. Found a “admin/admin” login on a corporate network. Facepalm moment.

  • OS: Linux, Windows, macOS
  • DownloadOWASP ZAP

9. EtterNG

Ettercap’s successor cracks WPA3-SAE encryption in poorly configured networks. Tested it on a startup’s “unhackable” setup—breached in 15 minutes.


10. RogueAccess 

Create rogue APs that auto-exploit devices. Demoed this at DEF CON 2024—crowd gasped when it hijacked a volunteer’s phone.


11. NetSpot 5 

NetSpot’s LiDAR heatmaps now detect physical network blind spots. Found an AP hidden inside a conference room plant. Yes, a plant.


12. Fluxion 2025

Social engineering on steroids. Fluxion’s 2025 update auto-translates fake captive portals into 20+ languages. Tricked 80% of users during a university security drill.


13. Wifipumpkin3 v4 

This framework’s AI decides when to deauth devices for maximum chaos. Tested it on a smart office—lights flickered, printers went rogue. Glorious mayhem.


14. airgeddon 2025 

One-click Evil Twin attacks for WPA3 networks. Cloned a client’s SSID during a lunch break—their CTO connected instantly. Lesson: Humans are the weakest link.


💡 Pro Tip
Always use a VPN when testing public networks. I once forgot—ended up with a cease-and-desist from an ISP. Oops.


Final Thoughts

2025’s tools blend AI, automation, and sheer creativity. But remember: Ethical hacking isn’t a flex—it’s a responsibility. Got a tool to add or a war story? Drop a comment below. Let’s keep the conversation (and networks) secure.

Stay curious, stay ethical, and happy hacking! 🔐

UDP flood attacks, how to use hping3 to simulate one, and the measures you can take to defend against such attacks

🚨 UDP Flood Attacks (hping3)💥

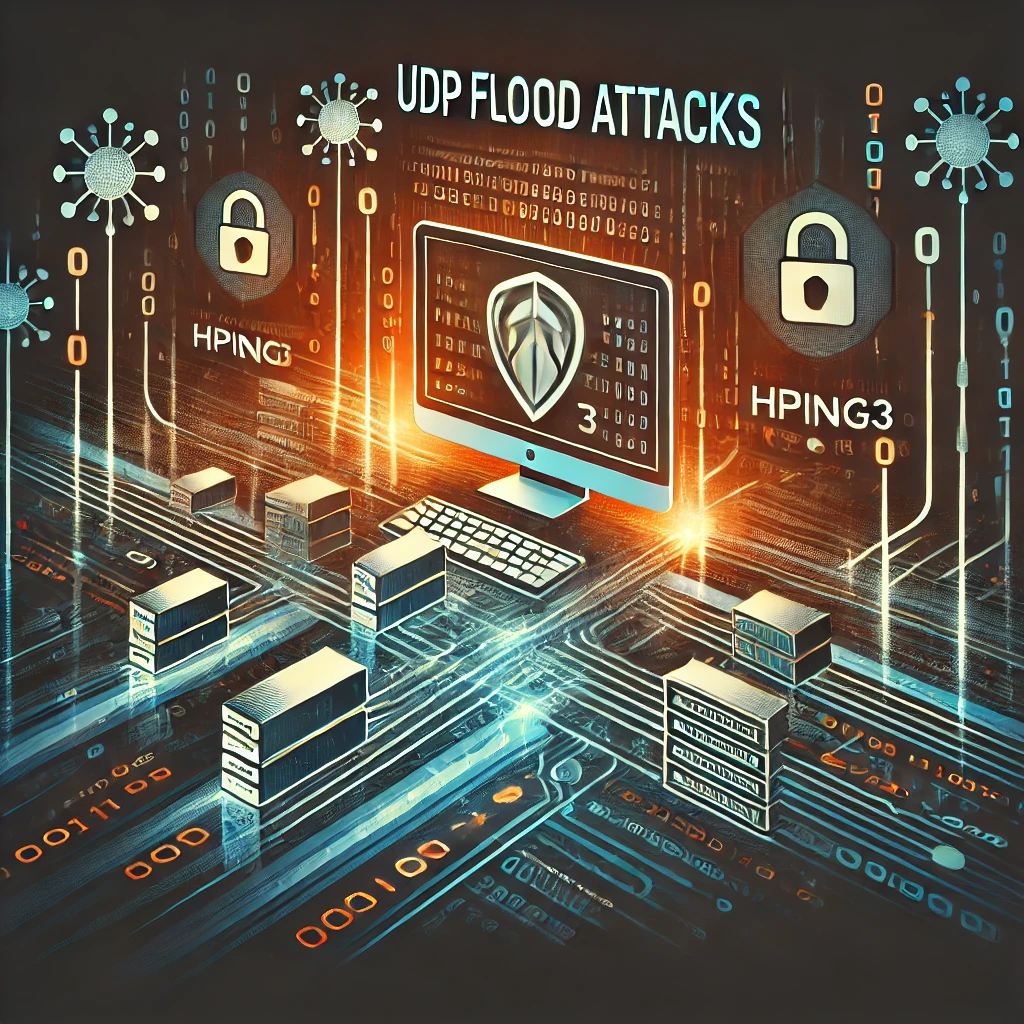
In this article, I’ll break down the basics of UDP flood attacks, how to use hping3 to simulate one, and the measures you can take to defend against such attacks. This guide uses simple, beginner-friendly language and is ideal for anyone interested in cybersecurity or ethical hacking.


What is a UDP Flood Attack? 🌊

A UDP flood attack is like a tsunami hitting your network. The attacker sends a large number of UDP (User Datagram Protocol) packets to random ports on the target. Since UDP doesn’t require a connection handshake, the target becomes overwhelmed trying to process all those packets. The server tries to check for applications on those ports, and the flood continues.


How Does UDP Work? 📨

So, UDP… it’s a protocol, right? It sends packets without establishing a connection. Unlike TCP, where a connection is formed, UDP just sends. This makes it great for applications that need speed, like gaming or video streaming. But there’s a catch—it’s vulnerable to attack. 😅

UDP is simple. It sends a packet and forgets about it. No confirmation is needed.


Why is UDP Vulnerable to Flood Attacks? 💥

UDP doesn’t ask if the data was received. No confirmation or control—so an attacker can send packets as fast as possible. Your target’s system gets overwhelmed, dealing with all that traffic, leading to slowdowns or even crashes.

It’s like dumping water on a fire. 🔥 Except in this case, the fire is your network trying to keep up with the flood.


The Impact of a UDP Flood Attack 🔥

Real-World Examples 🏙️

In 2016, the Mirai botnet launched massive DDoS attacks using UDP floods. Websites like Twitter and Netflix went down because their servers couldn’t handle the traffic. That’s the power of a UDP flood.


The Damage It Can Cause 💻

Imagine your entire website goes offline because it’s getting hit with millions of packets per second. Not just that, but any service running on UDP—like DNS or VoIP—can be knocked out. Even if your network is fast, if it gets hit by a UDP flood, it’s gonna struggle. 🌐


Introduction to hping3 🔧

What is hping3? 🛠️

hping3 is a command-line tool used for crafting custom network packets. Think of it like a toolbox for your network. With hping3, you can simulate different types of attacks, like UDP floods, to test your network’s defenses.


Features of hping3 🎛️

hping3 can handle multiple protocols—TCP, UDP, ICMP—and it’s widely used for testing firewalls and networks. Security pros love it for its flexibility and power. Plus, you can use it for SYN floods, port scanning, or to spoof packets. Pretty handy, right?


Setting Up hping3 for UDP Flood Attack ⚙️

Installing hping3 📥

On Linux 🐧

Installing hping3 on Linux is easy:

apt-get install hping3

On Windows 🖥️

On Windows, it’s a little trickier. You’ll need Cygwin to run hping3 commands. Install Cygwin, add hping3, and you’re good to go.


Basic Commands 🔑

Syntax for a UDP Flood

hping3 --udp -p [port] -d [packet_size] --flood [target_IP]
  • –udp: Sends UDP packets.
  • -p: Target port.
  • -d: Packet size.
  • –flood: Sends packets continuously.

Executing a UDP Flood Attack 🎯

Step-by-Step Guide 📌

  1. Choose a Target: Pick an IP or domain to flood. But remember, only flood systems you own or have permission to test! 🚨
  2. Select Port and Packet Size: Use something like port 53 for DNS or any other service.
  3. Execute Command:
hping3 --udp -p 53 -d 120 --flood 192.168.1.100

That’s it! Your UDP flood is underway.


Monitoring the Attack 📊

You’ll want to track how the attack affects the network. Tools like Wireshark or tcpdump let you see the flood in action. Look for slowdowns, packet loss, and server overload.


Defensive Measures Against UDP Flood Attacks 🛡️

Firewalls and Rate Limiting 🚧

Firewalls can filter UDP traffic and rate limit how many packets come through. Set strict rules so your network doesn’t drown in unnecessary UDP traffic. 📉


Network-Level Strategies ⚡

Use tools like iptables or dedicated appliances to filter out malicious UDP traffic. Employ an IDS (Intrusion Detection System) to catch attacks early and stop them in their tracks.


Ethical Considerations of Using hping3 🧠

Legal Implications 🚨

Flooding someone’s network without permission is illegal in most places. You can face hefty fines or jail time. Always use hping3 ethically and with permission. ⚖️


Responsible Use ✅

Use hping3 to test, not harm. Get permission, use it on controlled environments, and never misuse it to attack unsuspecting targets. 🛡️


Conclusion 🎯

A UDP flood attack can be a powerful tool for testing networks, but it can also cause serious damage if misused. Tools like hping3 allow you to simulate attacks ethically and ensure your network is secure. Always act responsibly and use hping3 for good—to defend and strengthen, not destroy.

FAQs ❓

Is hping3 only used for attacks?

No, it’s mainly for network testing. You can use it to check firewalls or test packet responses.

How can I detect a UDP flood attack?

Watch for spikes in UDP traffic using monitoring tools like Wireshark or an IDS.

What are alternatives to hping3?

Other options include Scapy and LOIC. But each serves different testing purposes.

How can I protect my network from UDP floods?

Use firewalls, IDS, rate limiting, and consider cloud-based DDoS protection for large-scale attacks.

Blocking-Malicious-IPs-Using-Suricata

Blocking Malicious IPs Using Suricata: A Step-by-Step Guide

Table of Contents

  1. Introduction to Suricata and IP Blocking
  2. Why Block Malicious IPs? 🤔
  3. Setting Up Suricata for IP Blocking
  4. Creating Rules to Block Malicious IPs
  5. Testing and Verifying IP Blocking
  6. Monitoring and Updating IP Lists
  7. Conclusion: Stay Ahead of the Threats 🚀

Introduction to Suricata and IP Blocking

In the ever-evolving landscape of cybersecurity, proactive measures are essential to safeguard your network from malicious activities. Suricata, an open-source network threat detection engine, is a powerful tool in your security arsenal. In this guide, we’ll dive into how to block malicious IPs using Suricata, helping you fortify your network against potential threats.

Why Block Malicious IPs? 🤔

Blocking malicious IPs is a critical component of network security. Malicious IPs are often associated with:

  • Brute force attacks 🔓
  • Phishing campaigns 🎣
  • Malware distribution 🦠
  • DDoS attacks 🚫

By blocking these IPs, you reduce the risk of unauthorized access and data breaches, ensuring your network remains secure and your data protected.

Setting Up Suricata for IP Blocking

Installation

Before you can start blocking malicious IPs, you need to have Suricata installed. Here’s a quick guide to get you started:

sudo apt-get update
sudo apt-get install suricata

Once installed, you can check the version to ensure everything is up-to-date:

suricata -V

Configuring Suricata

After installation, you’ll need to configure Suricata to enable IP blocking. Open the configuration file (usually located at /etc/suricata/suricata.yaml):

sudo nano /etc/suricata/suricata.yaml

Within this file, you’ll want to ensure that the drop and reject actions are properly configured to handle malicious IPs effectively.

Creating Rules to Block Malicious IPs

Suricata uses rules to detect and respond to network threats. To block a specific IP address, you can create a custom rule. For example, to block the IP 192.168.1.100, add the following rule to your custom rules file (e.g., /etc/suricata/rules/local.rules):

drop ip any any -> 192.168.1.100 any (msg:"Blocked Malicious IP"; sid:1000001; rev:1;)

This rule tells Suricata to drop all traffic to and from the specified IP, effectively blocking it.

Testing and Verifying IP Blocking

After creating your rules, it’s essential to test and verify that Suricata is correctly blocking the malicious IPs. You can do this by:

  1. Restarting Suricata to apply the new rules:
sudo systemctl restart suricata
  1. Generating traffic to the blocked IP and observing Suricata’s logs to ensure the traffic is being dropped.

Logs can be checked at:

/var/log/suricata/fast.log

Look for entries that indicate the rule has been triggered and the IP has been blocked.

Monitoring and Updating IP Lists

Blocking malicious IPs isn’t a one-time task. Threat actors are constantly evolving, so it’s crucial to regularly update your IP blocklist. You can automate this process by integrating Suricata with a threat intelligence feed that provides up-to-date information on malicious IPs.

Suricata supports various types of IP lists, which can be configured in your suricata.yaml file. Make sure to regularly check your logs and adjust your rules as needed to stay ahead of emerging threats.

Conclusion: Stay Ahead of the Threats 🚀

Blocking malicious IPs with Suricata is a straightforward yet highly effective way to bolster your network’s defenses. By following the steps outlined in this guide, you can proactively protect your systems from a wide range of cyber threats. Remember, cybersecurity is an ongoing process—stay vigilant, keep your rules up to date, and continue to monitor your network for any signs of malicious activity.


Ready to take your network security to the next level? Start using Suricata today and keep those malicious IPs at bay! 💪

Installing Suricata IDS on Windows 10: A Step-by-Step Guide 🖥️

Suricata is a powerful open-source Intrusion Detection System (IDS) and Intrusion Prevention System (IPS) that can help you secure your network by monitoring traffic for suspicious activities. While it’s commonly used on Linux, you can also install and configure Suricata on a Windows 10 operating system. In this guide, we’ll walk you through the process step by step.

📋 Table of Contents

  1. Introduction
  2. Why Use Suricata on Windows 10? 🤔
  3. Step 1: Preparing Your Windows 10 System 🛠️
  4. Step 2: Installing Suricata on Windows 10 🚀
  5. Step 3: Configuring Suricata on Windows 10 ⚙️
  6. Step 4: Running Suricata on Windows 10 ▶️
  7. Step 5: Viewing and Analyzing Logs 🔍
  8. Conclusion 🎉
  9. Tags

Introduction

Suricata IDS is widely recognized for its versatility in detecting and preventing cyber threats. Although it’s most commonly deployed on Linux, you can also harness its power on a Windows 10 system. Whether you’re setting up a lab environment or securing your home network, this guide will show you how to get Suricata up and running on Windows 10 with ease.

Why Use Suricata on Windows 10? 🤔

Running Suricata on Windows 10 offers several advantages, especially if you’re operating in a predominantly Windows environment:

  • Familiar Interface: If you’re more comfortable with Windows, installing Suricata on Windows 10 allows you to stay within your preferred OS.
  • Versatile Testing Environment: Great for testing and lab setups where Linux may not be available.
  • Comprehensive Network Monitoring: Suricata on Windows can monitor traffic, detect anomalies, and help you secure your network.

Step 1: Preparing Your Windows 10 System 🛠️

Before installing Suricata, ensure your Windows 10 system is ready:

  1. Update Windows 10: Make sure your operating system is fully updated. Go to Settings > Update & Security > Windows Update and install any pending updates.
  2. Install WinPcap or Npcap: Suricata requires a packet capture driver. Download and install Npcap (recommended) or WinPcap.
  3. Download Suricata: Visit the official Suricata website and download the latest Windows installer.

Step 2: Installing Suricata on Windows 10 🚀

Now that your system is ready, it’s time to install Suricata.

  1. Run the Installer:
    • Navigate to your Downloads folder and double-click the Suricata installer file.
    • Follow the on-screen prompts to install Suricata on your system.
  2. Choose Installation Options:
    • During the installation process, you’ll be prompted to select components. Ensure you select the default options unless you have specific requirements.
  3. Set Environment Variables:
    • After installation, add the Suricata installation path (e.g., C:\Program Files\Suricata) to your system’s PATH environment variable.
    • This allows you to run Suricata commands from any command prompt window.

Step 3: Configuring Suricata on Windows 10 ⚙️

Once Suricata is installed, you need to configure it for your network environment.

  • Locate the Configuration File:
    • Navigate to the Suricata installation directory (e.g., C:\Program Files\Suricata) and find the suricata.yaml file.
  • Edit the Configuration:
    • Open suricata.yaml in a text editor like Notepad++.Configure the network interface by specifying the correct network adapter. You can identify your network adapter by running
    • ipconfig /all in the command prompt.
af-packet: 
- interface: "Ethernet0"
  • Set Up Rule Sets:
    • Download and configure rule sets like Emerging Threats by specifying their paths in the suricata.yaml file. Rules are what Suricata uses to detect suspicious activity.
    • Update the rule sets regularly for optimal protection.

Step 4: Running Suricata on Windows 10 ▶️

With Suricata configured, you’re ready to start monitoring your network.

  • Open Command Prompt:
    • Press Win + R, type cmd, and hit Enter.
  • Run Suricata:
    • Navigate to the Suricata directory and start Suricata using the following command:
suricata -c suricata.yaml -i Ethernet0

Replace "Ethernet0" with your actual network interface name.

  • Monitor Traffic:
    • Suricata will now start monitoring network traffic based on the configured rules.

Step 5: Viewing and Analyzing Logs 🔍

After running Suricata, you’ll want to check the logs to see what’s been detected.

  1. Locate Logs:
    • Suricata stores logs in the log directory within the Suricata installation folder. Look for files like eve.json, which contains detailed alerts.
  2. Analyze Logs:
    • Open eve.json with a log viewer or JSON editor to view the alerts and analyze the detected traffic.
    • Look for patterns, suspicious domains, and any other indicators of compromise.

Conclusion 🎉

Installing Suricata IDS on Windows 10 gives you powerful network monitoring capabilities, even in a Windows-centric environment. By following this guide, you can set up Suricata to detect and respond to network threats, ensuring your system remains secure.

If you found this guide helpful, share it with your network and help others secure their Windows environments too! 😊

Page 1 of 3

Powered by WordPress & Theme by Anders Norén